
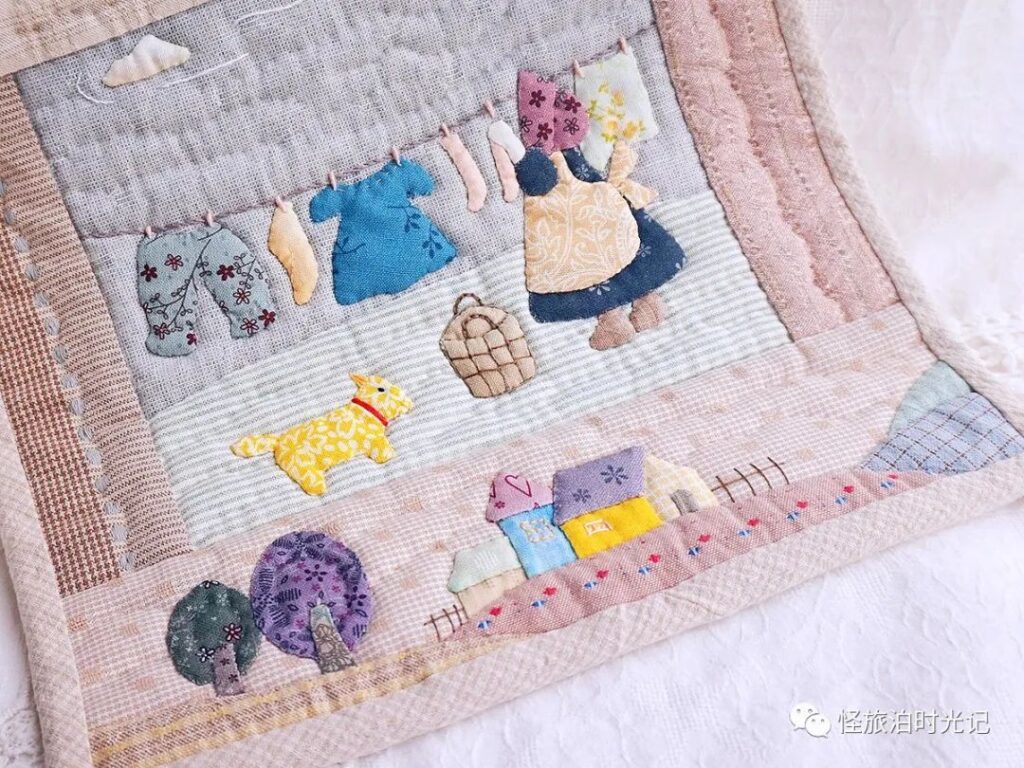
The idea of crafting a ‘Miss Su’ laundry wall hanging has been on my mind since two years ago. The designs were sketched out, but I hesitated to start, feeling my quilting skills were too novice to do it justice. As 2023 draws to a close, I decided procrastination was no longer an option. Miss Su’s life is vibrant and varied, encompassing not just laundry but also reading, gardening, and leisure. If I couldn’t even attempt something so simple, how could I begin with the rest? Thus, I spent a week completing the wall hanging, also known as a wall decoration, which is hung on the wall. I am largely satisfied with the final product. Even if I weren’t, I would say I am. The process was indeed mentally exhausting, and at times, I was utterly speechless. Let me recount the journey.
First came the design sketch. Undoubtedly, it was a rough draft. During the subsequent creation, I had to make some reluctant changes. I pieced together the entire fabric and then transferred the specific patterns onto the fabric using tracing paper. I began the applique process. This part was simple yet tedious; each piece of fabric took a long time to sew. The order of applique, which fabric to sew first and which to sew last, was entirely up to me, and I made mistakes easily, leading to a cycle of un-sewing and re-sewing.
Due to the erasable nature of heat drawing, it allows for corrections and redrawing, but I did not opt for the original size. The final step is edge binding, with a seam allowance of 0.5 centimeters.
Finished Product Display: Does it feel a bit too floral? I really like the image of ‘Miss Su’, who is always busy and always happy. This is the life I aspire to, so my creation of Miss Su will never cease, just like creating beautiful dreams. I hope everyone will like it.