In the hustle and bustle of modern life, there’s nothing more serene and beautiful than crafting a piece filled with creativity and warmth. Today, let’s delve into how to crochet a dreamy underwater world pillow, bringing a touch of coziness and childlike joy to every corner of your home.
Material Preparation To begin crafting this unique underwater world pillow, we need the following materials: Crochet Hook: Select a hook suitable for the size of the pillow, typically a medium or large size to quickly crochet a soft and sturdy fabric.
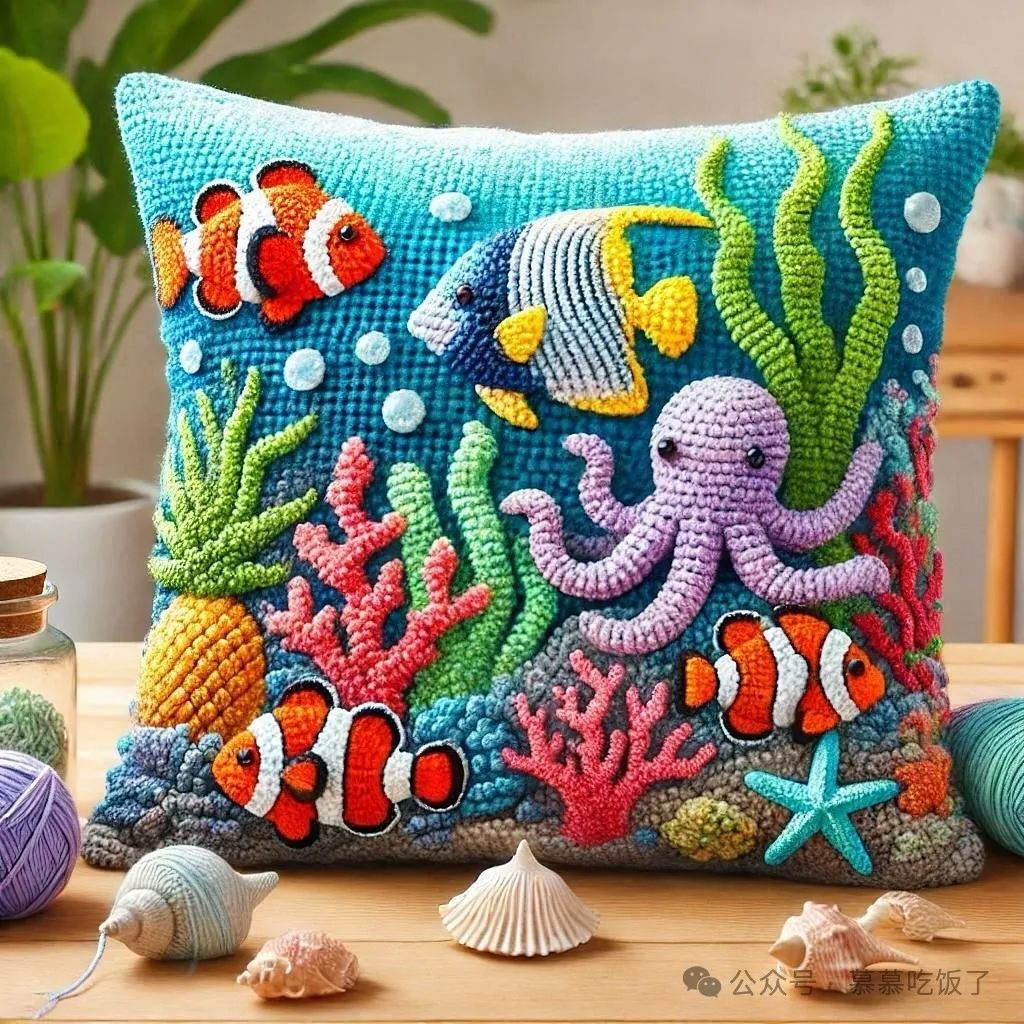
Multicolored Yarn: A variety of yarns in blue, green, white, yellow, and more to simulate the elements of the seabed such as corals, seaweed, and fish.
Filling: Opt for soft and eco-friendly polyester fiber filling cotton to make the pillow more plush and comfortable.
Eye Patches: Add eyes to the fish and other marine creatures on the pillow to enhance their liveliness.
Scissors, Sewing Needle, Markers, and Stitch Holders: Used for trimming yarn, sewing parts together, marking the progress of the crochet, and securing various parts during the process.
Crochet Steps 1. Crochet the Pillow Base Start by crocheting the base of the pillow. Using blue yarn, cast on stitches ranging from 60 to 80, depending on the expected size of the pillow. Then, following the circular crochet method, evenly increase stitches until a circular base is formed. After completing the base, begin crocheting the sides. Maintain the stitch count and continue circular crocheting, adjusting the density to form a natural wavy edge, mimicking the undulations of the seabed.
2. Create Underwater Elements While crocheting the sides of the pillow, interweave various underwater elements. Crochet seaweed with green yarn, corals with white and yellow yarn, and fish of different shapes with assorted colored yarns. For added dimension, temporarily secure the parts of fish and other marine creatures with stitch holders, and sew them after completion. Also, use eye patches to give these creatures eyes, making them more lifelike.
3. Refine Details and Sew Once all underwater elements are crocheted, sew them neatly onto the sides of the pillow with a sewing needle. Ensure the sewing is smooth and natural, avoiding obvious marks. Next, continue crocheting the top edge of the pillow until the desired closure height is reached. Then, sew the top edge to the sides to form a complete pillow shape.
4. Stuff and Arrange Stuff the filling evenly into the pillow until the desired fluffiness and comfort are achieved.
When filling, pay attention to maintaining an even distribution of the filling material to avoid areas that are too thick or too thin. Finally, trim off any excess yarn and threads with scissors to give the pillow a neater and more aesthetically pleasing appearance.
At the same time, inspect and arrange each element of the underwater world to ensure their positions and forms align with your original design intent.
In the process of creating an underwater world pillow, we can fully utilize our creativity and imagination. For instance, you can try different knitting techniques and patterns to simulate the various wonders of the seabed; or add interactive elements to the pillow, such as small bells or sound devices, to produce pleasant sounds when hugged, adding more fun.
Through simple crochet, we can bring the dreamy underwater world to life on a pillow, filling every corner of the home with childlike wonder and warmth. In this process, we not only enjoy the pleasure of crafting by hand but also allow our family and friends to feel our care and love. Why not give it a try? Knit a creative and warm underwater world pillow for yourself or a loved one.