
Project Overview:
Working Time: 1 – 4 hrs
When it comes to installing shower drains, there are two primary methods: compression-style and solvent-glued. Understanding the differences and installation processes is crucial for a successful bathroom renovation.
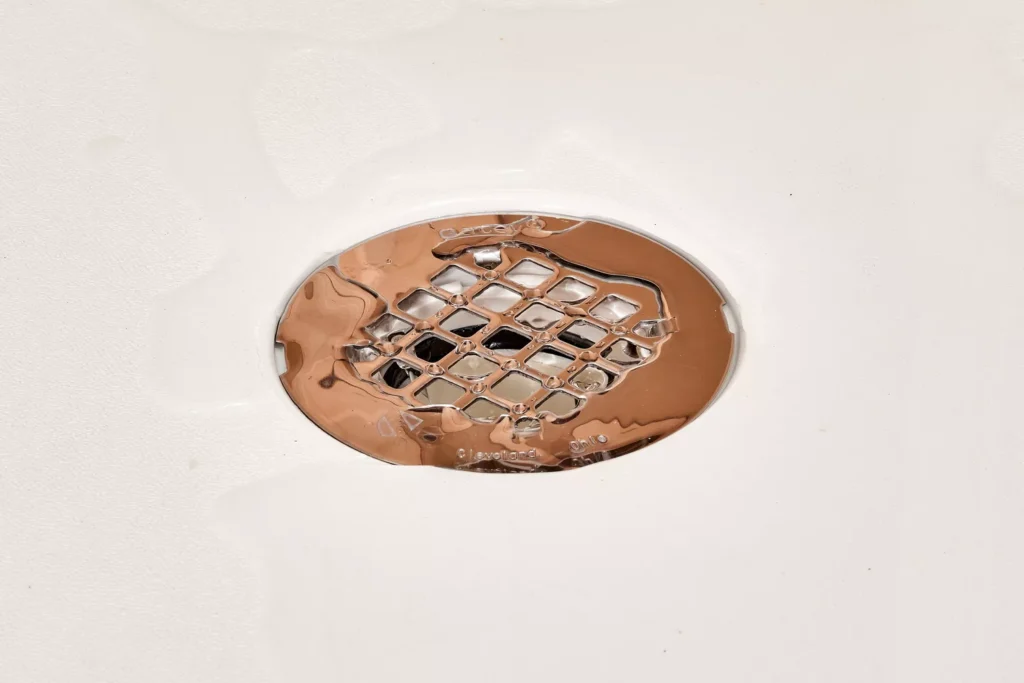
Compression-style drains are user-friendly, equipped with a fitting tool that tightens the nut from inside the drain using a screwdriver. This action compresses the rubber gasket against the drainpipe, ensuring a watertight seal. After tightening, remove the fitting tool and snap the grate over the drain opening. It’s important to allow the silicone to cure for a full 24 hours before using the shower. Solvent-glued drain assemblies are recommended when access below the shower is available, such as from an unfinished basement or crawlspace. These assemblies are typically PVC plastic, but older versions may use ABS plastic. It’s essential to match the shower drain to the type of plastic in your drain system. Like compression-style drains, solvent-glued types are compatible with steel, fiberglass, and acrylic shower bases. Measuring accurately is vital when working with solvent-glued fittings, as it can be challenging to get the pipe measurement right. Always measure carefully and test-fit the pieces before gluing. Manufacturer’s recommendations should be followed for adjusting the drainpipe to the proper height, often involving trimming the pipe at the exact level of the subfloor. Solvent-glued shower drain assemblies usually consist of several parts: a strainer cover, an upper body, and a lower piece with female threads. Begin by disassembling all parts and setting aside the cardboard friction washer and rubber sealing washer. Apply a bead of silicone caulk around the flange of the shower drain opening and immediately set the upper body of the drain assembly into place. From below the shower base, place the rubber sealing gasket and paper friction gasket over the male threads of the upper body. Thread the lower body onto the upper body and tighten until silicone oozes out around the flange. Wipe away any excess silicone and attach the metal grate. For the final step, spread plastic pipe primer and solvent glue on the drainpipe and the inner surface of the lower drain body’s smooth socket. Slide the drain pipe into the socket and hold until the bond hardens. Allow the solvent glue and silicone caulk to cure for 24 hours before using the shower.Installing a tile shower drain involves a three-piece drain assembly, each piece installed at different stages of the tile pan installation. The waterproof membrane liner is crucial, as it is sandwiched between two lower flanges and ensures any water that gets under the mortar drains properly without leaking.
The final visible piece is the strainer assembly. If a tile professional is handling your custom shower base, they will include drain installation in their process. Start by installing the bottom flange after preparing and cleaning the shower subfloor. This is typically done by solvent gluing it into the drainpipe. Following this, apply a bed of mortar around the drain opening, creating a slope towards the drain. Once the mortar bed is dry, install the waterproof membrane liner over the floor and the lower flange of the shower drain. Seal the liner to the drain flange with silicone caulk and trim the liner around the drain opening. Next, insert the middle flange over the liner and drain opening, securing it to the bottom flange with bolts. This step often includes a leak test by pouring water over the shower pan. Finally, attach the strainer assembly to the drain, extending it above the liner according to the manufacturer’s instructions, which can be up to 1 1/2 inches for solid mortar bed installations. With the strainer assembly in place, you can proceed with the ceramic tile installation, which includes applying a second layer of mortar and then the tiles themselves. Ensure the tiles are grouted, sealed, and cured before use. The 7 Best Non-Slip Bath Mats are also a consideration for safety in the shower area.