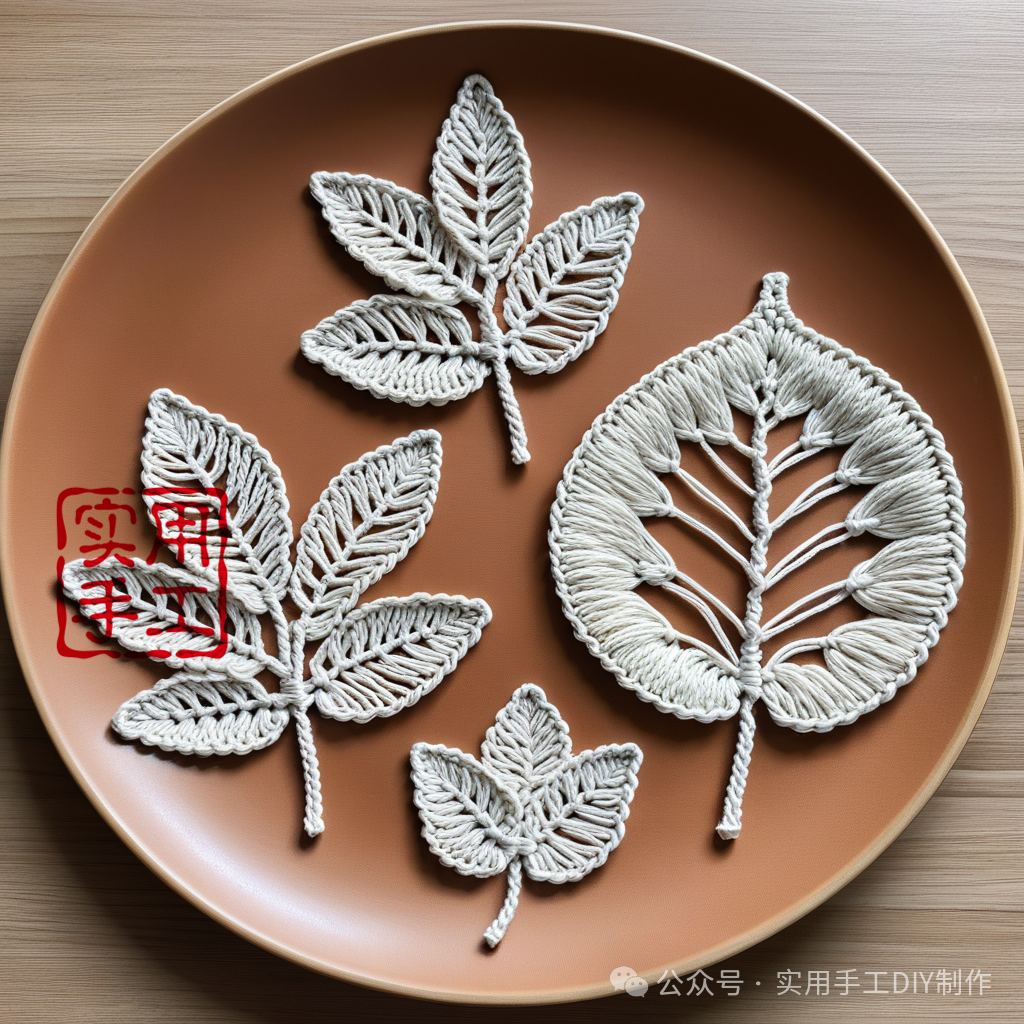
Here is a simple step-by-step guide to making a macrame leaf plate:
Materials: – Rope (cotton rope or other easy-to-knot rope is recommended) – Scissors – Cardboard or other rigid material (for creating the leaf-shaped template) – Glue (if needed to secure certain parts) Steps: 1. Prepare the template: Cut a leaf-shaped template from cardboard to serve as your guide. 2. Cut the rope: Based on the template size, cut several lengths of rope. Ensure they are long enough to knot and cover the entire template. 3. Secure the starting point: Attach multiple strands of rope to the top center of the template using glue or temporary clips. 4. Begin weaving: Use basic macrame knots, such as square knots or spiral knots, starting from the top and following the template’s outline. Maintain consistent tension for an even shape. 5. Create leaf veins: Adjust the spacing between knots to mimic the veins and texture of a leaf. 6. Finish the edges: When reaching the bottom of the leaf, ensure all ropes are securely fastened. Use glue or tie a knot to secure the ends. 7. Trim: Cut excess rope for neat edges. Use cardboard or other tools to flatten and shape the leaf. 8. (Optional) Decorate: Enhance the leaf plate with artistic touches like dyeing, adding beads, or thin cords. Tips: – Choose the right rope: Thicker cotton rope makes the leaf plate sturdier and more durable. – Be patient: Macrame requires patience and precision, especially for complex shapes. – Practice basic knots: Familiarize yourself with fundamental knots before starting for smoother execution. By following these steps, you can create a beautiful macrame leaf plate. Enjoy the process and the satisfaction of handmade craftsmanship!